I love a good challenge and I have found that as a parent I just have to keep learning. Over the last few years I had requests to make a triceratops cake, to prepare Mulan/China themed party, Frozen party (of course!!!), dinosaur party. This year it was the science party! I had lots of fun preparing it and thought I might share some of the experiments that are very easy to prepare. I only have a few snapshots because I was doing the experiments at the same time, but hope you find some of the ideas useful.
I used this idea for the invitations -
Science party invitation. I was too lazy, so ours didn't have "sleeves" and "pockets".
We started off with the
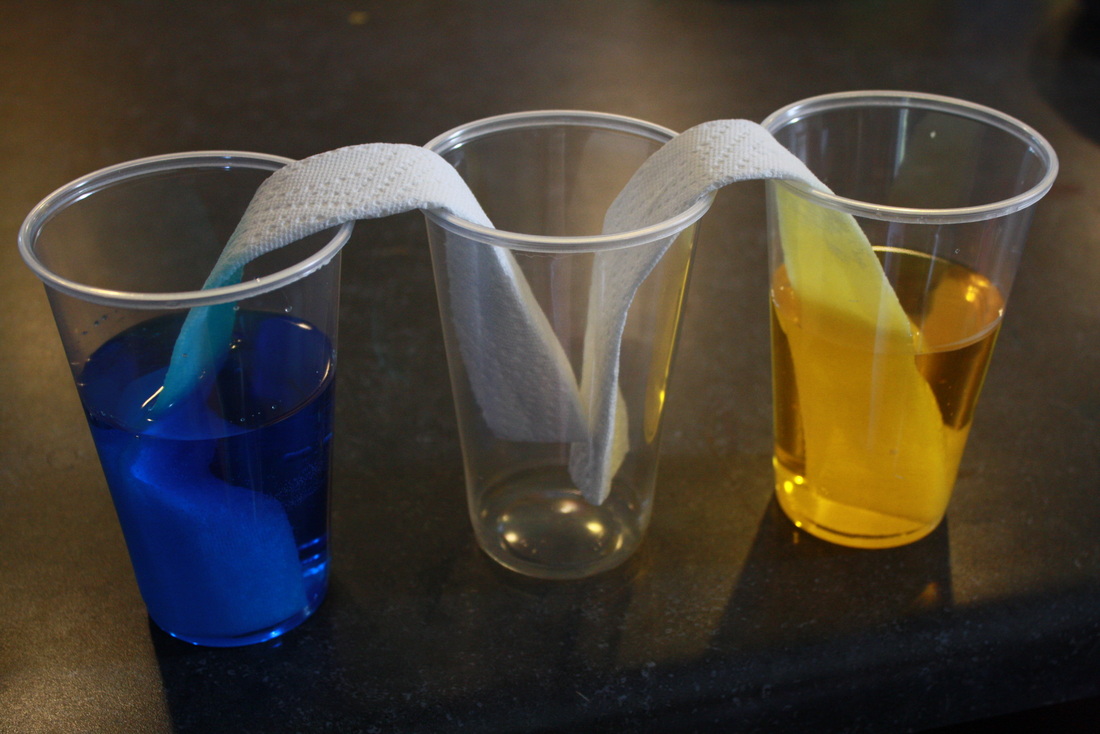
walking water experiment. I run it first because it's interesting to keep checking the progress as the time goes by. There are different ways of doing it, but you need a few clear cups, blue, yellow and red food colouring and kitchen towel. If you arrange them in a circle you would need to fill 3 cups with water and different food colour, if you arrange them in the line, you would need an extra cup with red water. Between those cups you need to place empty clear cups. Then you need to fold kitchen towel and connect all the cups. The water would then get absorbed into paper towels and "travel" into the empty cups and mix inside them. Here is an example with just 3 cups -
http://www.coffeecupsandcrayons.com/walking-water-science-experiment-kids/
I didn't take any photographs in the beginning but that's what it looked like at the end -
We had another simple experiment about different colours - we filled test tube with liquids with different density. There are many options, I chose 3 we had on hand: blue washing up liquid, water with red food dye and just vegetable oil on top - 3 layers. Then some kids experiments and shook the test tubes and then we checked if the layers separate again. Here is the link to see how to make lots of different layers -
http://kindergartenlifestyle.blogspot.co.uk/2014/03/liquid-rainbow.html?m=1
We made a volcano from a plastic cup and foil. I filled the cup with 3 spoons of soda, 1 spoon of washing up liquid, 1 spoon of water. We then added vinegar and watched the foam overflow. Then, another experiment based on soda and vinegar reaction. You only need empty bottles, balloons, soda and vinegar. We put some vinegar in the empty bottles, and a couple of spoons of soda in the balloons. We carefully pulled the balloons on the bottles and tipped the soda inside bottles and watched the balloons blow up. Here is a very good explanation -
https://uk.pinterest.com/pin/442197257137818648/
Another very simple and effective activity was building molecules. You would need either soft round sweets or we used marshmallow to connect either tooth sticks or some spaghetti. I have found a very good templates with some examples of simple molecule structures -
http://www.oneprojectcloser.com/isabellas-6th-birthday-lots-fabulous-scientist-party-ideas/
The last experiment was making a slime, we didn't have much time to do it properly, and there are no images for it at all, but it turned out very well, so I will share with you - it's a slime :) It sounds a bit strange, but it's very stretchy and we enjoyed playing with it after the party was over. I was very happy I found a recipe for UK, because a lot of American recipes had borax and I didn't know where to find it. So, you only need an ALDI non-bio washing up liquid (not sure why this specific one, but apparently it has the right components), you need some PVA glue and you can add food colouring if you want it to be specific colour. I have no idea about the proportions, I just added a bit of each, it will look very unattractive at first, but you need to kneed it and the result should be a very lovely and stretchy slime! We haven't made as much slime as here -
lovely slime - but this should give you an idea.
And
here is the Pinterest board I put together while preparing for the
science party, hope it give you some more ideas!